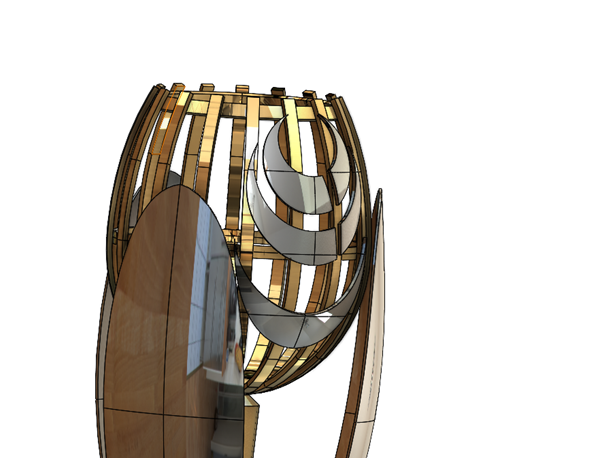
The Lions Tour Trophy is a beautiful piece of craftsmanship, and to honour this we thought we’d take a crack at modelling it. What better way to do this, than using the latest in cloud tools, alongside one of the worlds best CAD packages, to model it?
Given the beautiful curves on the trophy, obviously our journey starts in 3D Sculptor, we start with a spherical primitive, and shape it into the general shape of the “egg” or cup at the top of the trophy.
From there, we add some loops and additional items in the real cup. But why do we do it this way? Why not just use splines in SOLIDWORKS. There’re 2 reasons for this:
- We can much more easily edit the surface/shape and have that update downstream (see video below).
- We can pull this into the rest of the apps in the platform now, especially some powerful tools in the 3D Pattern Shape Creator, a parametric generative design tool, that we could use to create any shape, be it the cage/sweeps we see, to complex Voronoi or hexagon patterns, that update as the shape updates! (Come check our webinar for more on this!)
All of these are cloud-based tools, that run in any browser, so you could be doing all of this on a tablet!
From there, we spend some time adding in the outer surface and its shape, along with the pillar holding it all up. We then shoot this off to our SOLIDWORKS Engineer, for the finishing touches, and to render in Visualize.
First things first, getting that outer surface cut as we need it, this is where the surface on spline tool helps a lot! A few cuts, split lines, and patterns later, and we have our basic shape, all that is left is the base and logo!
Since the base is a radially symmetric shape, a quick revolve resolves that, and we add some appearances as well.
Our last and most difficult job, however, is the beautifully shaped logo on the cup head, but SOLIDWORKS has the perfect set of tools for this. These tips can help you add any logo to an irregular shape:
- Use an image as a reference, you can insert images into sketches using the “Sketch Picture…” command.
- Scale and shape the image as needed, then use lines, curves, and splines to get your Shape (control polygons make splines a ton easier to control, so remember to enable them!).
- Once done, use the wrap feature to add them onto our egg shape we created earlier (referencing the same shape, which means down the line everything will update if we make a change in sculptor again). A few surfaces trim’s later, and we have our finished shape!
- Just add a pinch of thicken, and voila!

This design is part of a 3-series CAD Challenge between MECAD and Solid Solutions - UK SOLIDWORKS Reseller.
Read more about their challenge's results here.


.png)